Tuesday, August 31, 2010

Gearing up (and down)

Lest you think this build is going to be all sunshine and fairy tales, we're now at a problem I knew about when I bought the kit and was going to have to deal with during construction: the landing gear.

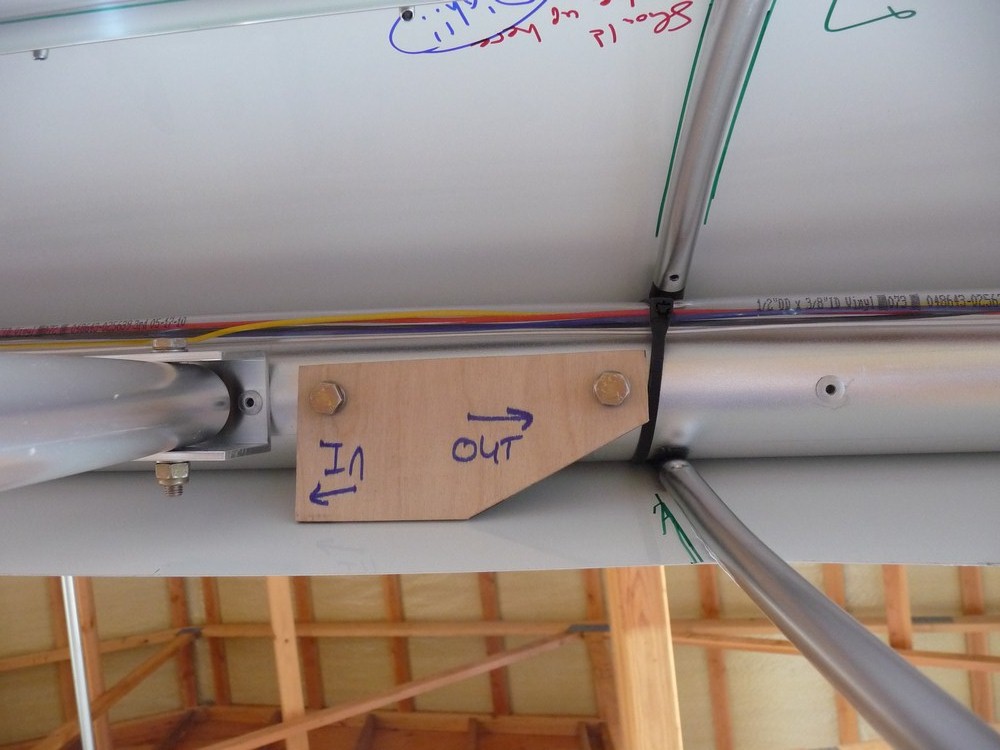
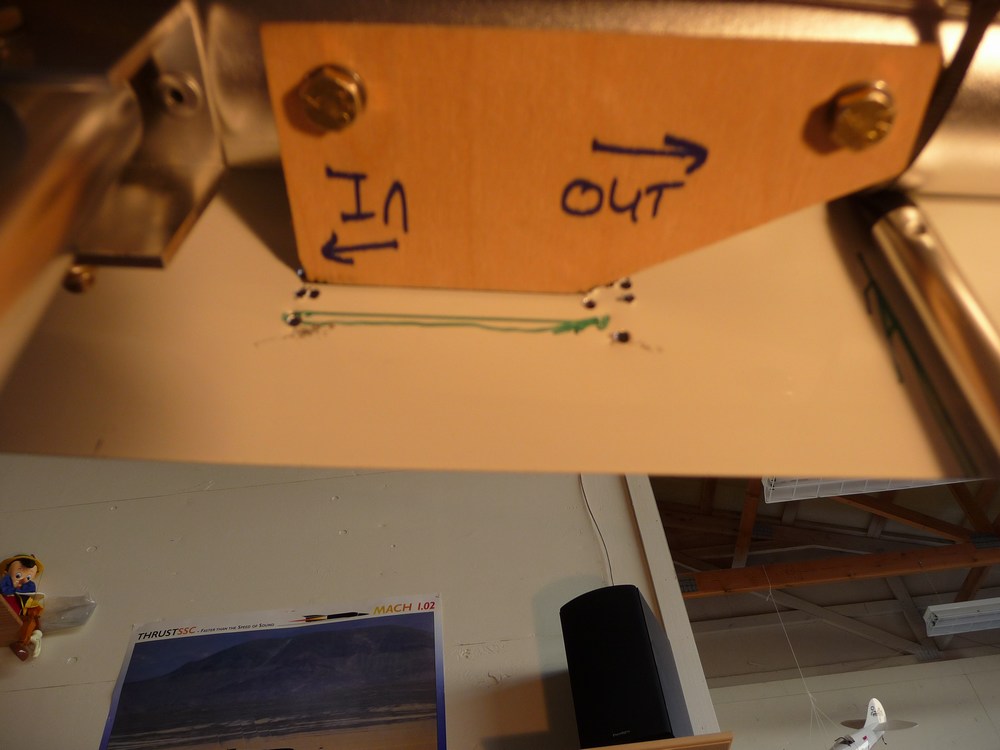
In the kit design the travel of the landing gear actuators is determined by external limit switches mounted on the bulkhead. The good thing is that it's easy to adjust them, the bad thing is that they're exposed and can be affected by water, knocked out of alignment, etc. I was tipped off that the same manufacturer makes the same actuator but with the switches mounted internally, factory sealed away from the elements and unable to be knocked out alignment. If I had been thinking I would have researched the problem and ordered them when I was building the wings, but I was happily living in a state of denial about having to deal with it. It will take about 5 weeks for them to be built and delivered.


The major problem I have with the gear is that there's no manual/emergency extension option. As in any mechanical system there are a few points of failure, from not having an electrical system problem and not being able to extend the gear, to the worst case having a failure of one actuator and having only one leg extend. Yeah, the odds of this happening are pretty small, but in 21 years of flying I've never had an engine fail yet I still practice my engine out procedures.


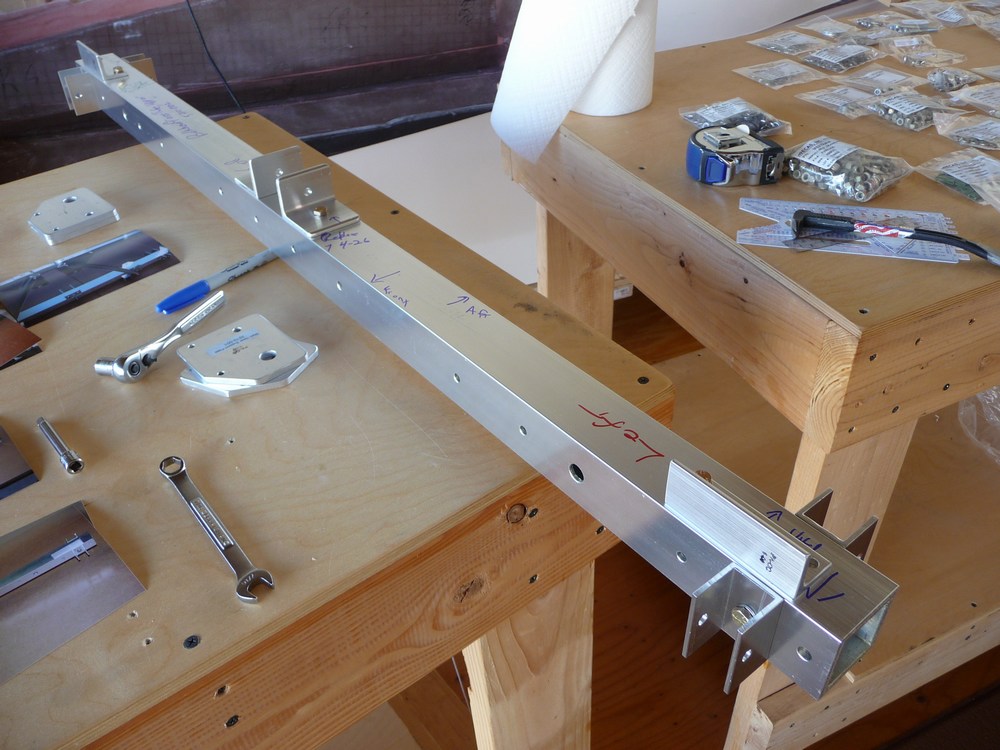
I decided to go ahead and build the kit landing gear to become familiar with it and because I was curious.


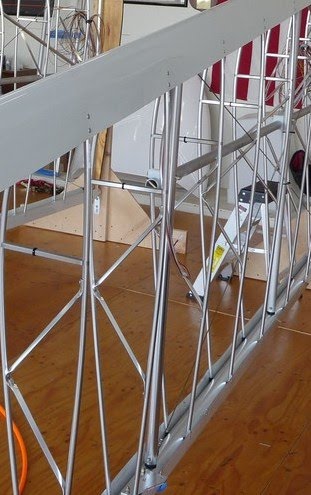
A wide shot of the gear down and locked.


Sunday, August 29, 2010

Frame Zero

The bulkhead is the backbone of the airplane. Everything-wings, tail, cockpit, engine, landing gear-tie together here. A poor job of assembly could mean anything from a collapsed landing gear to a failed engine mount.


Here's what the bulkhead looked like at the start of the morning.


And by the end of the day. This is roughly where it will mount in the airplane.


A test patch of paint inside the nose. I want to refrain from adding weight to the airplane but painting the inside will make it easier to spot leaks or dropped objects when I'm working on her after she's built.


And the first bits of the landing gear start to take shape. These are the scissors to extend/retract the main gear struts.


Years ago I was fortunate enough to be selected to go to the Embraer factory in San Jose dos Campos, Brazil and pick up a brand new EMB-145. While there we were given a tour of the factory and at one point encountered an airframe that was designated for my company. They were just beginning to assemble the cockpit window frame and it was unexpectedly moving to touch the metal and know that in a few months I would be inches behind this assembly and it would be protecting me from hundreds of miles an hour of windblast.

I had that feeling again today after painting the test patch and setting the bulkhead in place. Even though I've been thinking about avionics, panel layouts and seats for months it's all been vaguely abstract. But today it really started hitting me about what I'm doing, that I am building my own personal aircraft and the choices I make will be ones I live with every time I fly.


The cockpit was my office. It was a place where I experienced many emotions and learned many lessons. It was a place of work, but also a keeper of dreams. It was a place of deadly serious encounters, yet there I discovered much about life. I learned about joy and sorrow, pride and humility, fear and overcoming fear. I saw much from that office that most people would never see. At times it terrified me, yet I could always feel at home there.
— Brian Shul, 'Sled Driver; Flying The World's Fastest Jet,' 

I got lucky, I got everything I wanted
I got happy, there wasn't nothing else to do
And I'd be crazy not to wonder if I'm worthy
Of the part I play in this dream that's coming true.
Kris Kristofferson, Pilgrim's Progress

Friday, August 27, 2010

Laying the keel

I took a little break from the 'Rey after finishing the wings. Clear my mind and do a lot of reading about the next steps...

It's been joked that with my gray hair and cheater glasses I looked like Geppetto so a friend sent me a mascot for the hangar.


Progressive has been in the process of getting the airplane certified under LSA rules, and this month they announced the wing and tail feathers had passed certification. There are a few things that need to be changed/upgraded and PA sent them out for only the cost of shipping. Nice of them.


Just like the other parts of construction, getting organized reduces the hassle (and future problems!) of the build.


PA also released a series of images of one of their builds, I had Costco print them out and they've proven invaluable already. Using the photos and manual I dry fitted the parts to the lower crossbar before bolting them together.


The assembled lower crossbar.... (urgent update for builders. Please see entry for 7 July 2012. Can YOU spot what I messed up??)


and upper crossbar.


My knee was killing me so I called it for the day. The long days of summer are coming to a close....


By the way, her name is OspRey

Thursday, August 19, 2010

I'm flashing you...

Thought you'd like to see the LED nav lights in action.


All it took was a 9v battery.


Position lights consume 0.35 amps of power.


Position + strobes take 1.65 amps. That's the LED strobes firing.


Lighter, cheaper, lifetime warranty, no noise from the power supply. Me likes!!

Spreading her wings....

I'll spare you the nitty gritty details, but the left wing went together with no problems....


Despite a nagging worry, I even managed to get the wing/strut mount plate mounted in the right direction, and even on the bottom of the wing not the top. (Ok, the Dremel got away from me once.)


Ok, ok... I'll admit it. Just like the flight is never over until the airplane is chocked, the build is never over until all the rivets are in. I got to the third to last rivet and started patting myself on the back too soon, and mismeasured drilling a rivet hole by 3/8". Not structural, and it will be invisible when the covering is on. But it was a reminder to stay humble.


I realized I was going to have to move the wings around the hangar so I've put wheels on the jigs.


And with the wings done it's moving and cleanup day.


But who can resist setting things up?


That's pretty close to the actual span and chord of the wing. 


Now there's room to build a fuselage....


Time to crack the books. That bag is some of the hardware to build the fuselage with.


The fuselage is a long build so we'll be working on it for the next year or so.

Friday, August 13, 2010

I'm a Right Winger??

To finish the wing you need to bend the trailing edge of the leading edge cuff to keep it from wearing on the fabric. Take 2 pieces of 1/2" x 13" x 3" wood, and bolt them together while sandwiching a washer in between. Remember my scrap wood bin?


This leaves a gap to insert the cuff into.


Now mark the center of each bay, and mark 1/2" back from the edge of the crimper.


Bend the trailing edge of the cuff in each bay (top and bottom) down about 30-45 degrees.


By the time I finished the crimper had gotten trimmed a bit to fit into some of the bays.


A couple of the bays on the bottom are still so tight you have no choice but to use a hand crimper.


Not quite as smooth though....


The top came out very nice, which is a good way to end this phase of the wing construction.


About that time a buddy stopped by and  gave me a head's up that TSA was wandering around the airport, looking for people who weren't wearing their SIDA badges and generally being TSA. (Two Strolling Around) It was a good time to call it a night, and as I watched the gate close behind me I saw them walking down the ramp by my hangar. Timing is everything.

Until it's time to cover, the right wing is done until next summer. For a few days I'll just have to lean that way.

Thursday, August 12, 2010

Realistic Distractions

I love my hangar. It faces northeast so when the storms come in and the rain comes from the south I'm protected. Afterwards when it's post-frontal and the wind blows from the south I'm in the wind shadow. During the long days of summer I get gentle morning sunlight that reflects off the wood and gives the hangar a golden, mellow glow. Then when it gets hot in the afternoon I'm in the shade and can leave the doors open for ventilation and light without it being too hot.

The bad thing about my hangar is that I'm a few hangars down from the first airport entrance on a main drag, so it's not uncommon to have visitors. It's been interesting (and sometimes frustrating) to experience the range of personalities I've had stop by and visit on their way into the airport.

Some people feel absolutely no compulsion about walking right in, stepping on air hoses and electrical cords and picking up anything they see without a "May I?" Another builder at the airport warmed my heart when I was away from the hanger for a few minutes and he patiently waited outside until I returned, introduced himself and asked if he could come in and look around.The great majority are somewhere in between, and are a pleasure to meet.

It's a Catch-22. If I stopped each time someone stopped by I'd never get anything done, if I kept working I'd miss the opportunity to meet some great people, or get the reputation of being a grumpy misanthropic loner. (wait, that sounds familiar....) 

It really becomes a hazard when I'm interrupted in the middle of something, and I miss where I left off when I resume work.

The next day I took the template to the airport. The wing strut plate is mounted inside the leading edge wing cuff, and to mount the plate/template you're bent over working upside down and inside the cuff.


First I covered the area underneath so I didn't FOD the inside of the trailing edge cuff.


I was in the process of bolting it on when someone came by and we stopped to chat.


After mounting the template you draw an outline of where it touches the wing cuff, remove it, punch the outlines and drill.


Look at the kitty.


Now at the template


Now the kitty


Now back at the template.


Did you see what was wrong with the template?


I drilled the first 4 holes, took a look and wiggled the template. It was loose. I went "Aw shit...", spotted the loose bolt, tightened it down, repunched and redrilled.


A drill, a dremel, a pair of tin snips later....


Pretty close, time to clean it up with a couple small files.


The slot is not symmetrical, and the two holes that were drilled before the plate was correctly tightened are frustrating, but not critical so I can write them off as a Lesson Learned. I may be able to use them later when it comes time to run the landing light wire.

Wednesday, August 11, 2010

Leading it on

First, a couple people have asked how I have so much time to work on the SeaRey. Am I retired? Lazy? Living the life of a rich airline pilot?

The answer is None of the above. Back in March I had a mishap with my right knee, the same knee I had surgery on in 2005. At this point it's been determined that reopening the knee will cause more damage than acceptable, and we're on a long term physical therapy program to try to bring it back. I've talked things over with my physical therapist and he says that as long as I'm not kneeling on it or climbing ladders, working in the hangar is Ok and in some cases good for the knee. Glad I put in that wood floor.


So let's finish this wing.

Next was to drill the inter-bay holes for the cuff supports.


And work on the wingtip. The guys on the tech site sent me some images of how much should be cut off and I used that as a guide. Sure enough, when I trimmed it as far back as they suggested it fit fine.


And I filed it down for a smooth edge.


By this time the poor wing looks like it's a cleco porcupine.


45 minutes and a double handful of stainless steel rivets later...


Next will be to install the front strut mount plate. To do so you first make a template off the real one.


I used a bit of scrap wood I had in my scrap wood bin at home.


While my hangar is spacious, my home workshop is anything but.