Thursday, January 27, 2022

Say Ahhhh.....

 Wiring is all finished but new harnesses had to be ordered from Fast Stack, that will take a couple months so it's time to do the rudder block AD and replace the nylon ones with some beautifully machined ones from another SeaRey builder. Fortunately, all I had to do was disconnect the two side braces, loosen the bolts on the bottom tubes, and undo the front bulkhead mounting screws. 


My HiD lights were something that always bothered me, if you turned them off they needed a cooldown period before you could restart them, and they sucked electrons. The guys next door put 2x 200w 5000k lights in their hangar and I was impressed, so I ordered 4x of the 200w 4000k lights and reflectors.

 
https://www.amazon.com/HYPERLITE-250...ch&sr=8-2&th=1

https://www.amazon.com/HYPERLITE-Deg...ch&sr=8-1&th=1


I'll never use them enough to make up the for cost vs the HiDs, but one of the HiDs was going bad and needed to be replaced, so it had to be done.

The light is... different. I got more sideways light off the HiDs that bounced off the upper corners of the hangar, but the light from these are "cleaner", if that makes any sense. I probably should have ordered the frosted reflectors, there's a bit of glare from the clear plastic reflectors, and they're bright as hell if you happen to look up at them, but if I didn't know there was an option I'd be happy with these. If I have an opportunity I might take down the bottom lens and hit it with a light coat of spray paint to take the edge off.


Monday, December 6, 2021

Friday, February 26, 2021

Hooking up

It's easy to build something, but when they need to be repaired, that's another. I've been a bit obsessive about figuring out how to make wires easily disconnectable, I thought I had the problem licked when I discovered dsub connectors, but then I field (hangar?) tested it by sitting in the cockpit and trying to removed them, and it was a mess.

Luckily, a RV pilot on VAF tipped me off about the Molex Microfit 3.0 connectors, the same one Dynon uses on the backup battery connector. The good people at Mouser sell these, and pre-crimped wire leads, too. Perfect for trim relays, among other things. Gives me practice using a multimeter for a continuity check, too.


Unfortunately, they were still too big for the Oznium LED alert lights. Scratching my head, I went back to my model airplane roots and dug up these 2 wire power connectors that are good up to 3A, more than enough for the warning LEDs, and they fit through the screw on nuts perfectly. 


I also slightly rearranged the order of the warning lights to match the switches on the panel. Note the original LEDs that I love on the bottom row that turned out to be too bright, and the ones we;re using temporarily mounted across the top. Of course, since the new lights have a smaller opening... I could have filled the bigger holes with mud and redrilled them, but there are a couple other mods I want to make to the panel (tell you about them later), so I'll make another, final (yeah right), panel.


Thursday, February 25, 2021

Fitting the fin (aka, Just gimme the damn chainsaw!)

After painting I was in a mental block about going back to the wiring, so I decided to hang the stabs and take a look. While I was at it, I decided to fit the fin fairing, which turned into a more involved project than I anticipated, especially when I realized that the lineup would influence the handling of Osp. If the fairing was misaligned, she'd tend to yaw one way or another. Sure, I can fix it via the rudder trim tab, but, y'know.

Snap a chalk line from the pylon to the fin leading edge, then rivet the fairing mounting bracket.


I had been guessing where the fairing should go, finally I realized there was no exact measurements, let the parts tell me, and roughly outlined how much to be trimmed with blue tape.


I kept trying to sand the inside of the fairing by hand but it was so rough and there was so much to remove there was no way I was going to do it by hand. Great idea from the internet, a drum sander from Harbor Freight Aircraft Supply and an extender wand made quick work. Had to be VERY careful though, I nearly went through the side a couple times. 


I kept trying to make a perfect fit, but after examining other builders and thinking about it, I realized a perfect fit meant having a gap for flexibility. Once I realized that I put the ultra-fine Dremel sanding disc away, got the ultra-fine chainsaw out, and carefully made her fit.


Fairing fitted, I was able to mount and trim the stab brackets. They've since been powder coated white and look beautiful.


Take a look at me now...

I was at the Holiday fly-in at Lakeland Airport last December, there was a stunning homebuilt biplane on the showline that made me weep at the quality of the fabric work, the kind of work that just made me want to completely strip and redo Osp. Walked all around the wings admiring the smooth, straight lines, and absolutely perfect, dust free finish. Came up to the cockpit and looked at the rear coaming and...

I can only imagine how that builder felt. On the other hand, maybe I do know.


What's that old saying, A man's reach should exceed his grasp, or what's a heaven for?


A nice day gave me the opportunity to run everything outside and put it in perspective.


I was finally able to put these on her tail. I don't know why the gentleman made OspRey a member of the Ferret Rescue Service long before she was even hatched, but they're something we cherish.


and for a while, everything gets put away again.


Wednesday, November 25, 2020

1, 2, 3. Painted by me.

With winter coming and wanting to get it done before the bad weather sets in, I spent some long days and nights carefully sanding FOD off.


Bathtime!!! Even with the problems, its so nice to be able to take them out in the sunshine without worrying about UV deterioration of unprotected fabric.


Greg suggested I up my game and carefully use 320 grit. Done.


I'm forced to say nice things about RV pilots now, very generous of my friend to allow me use of his booth.


PolySpray cannot be applied over Aerothane for UV blocking, so instead a couple light coats of Aerothane Silver do the trick over areas that were sanded down to silver. 


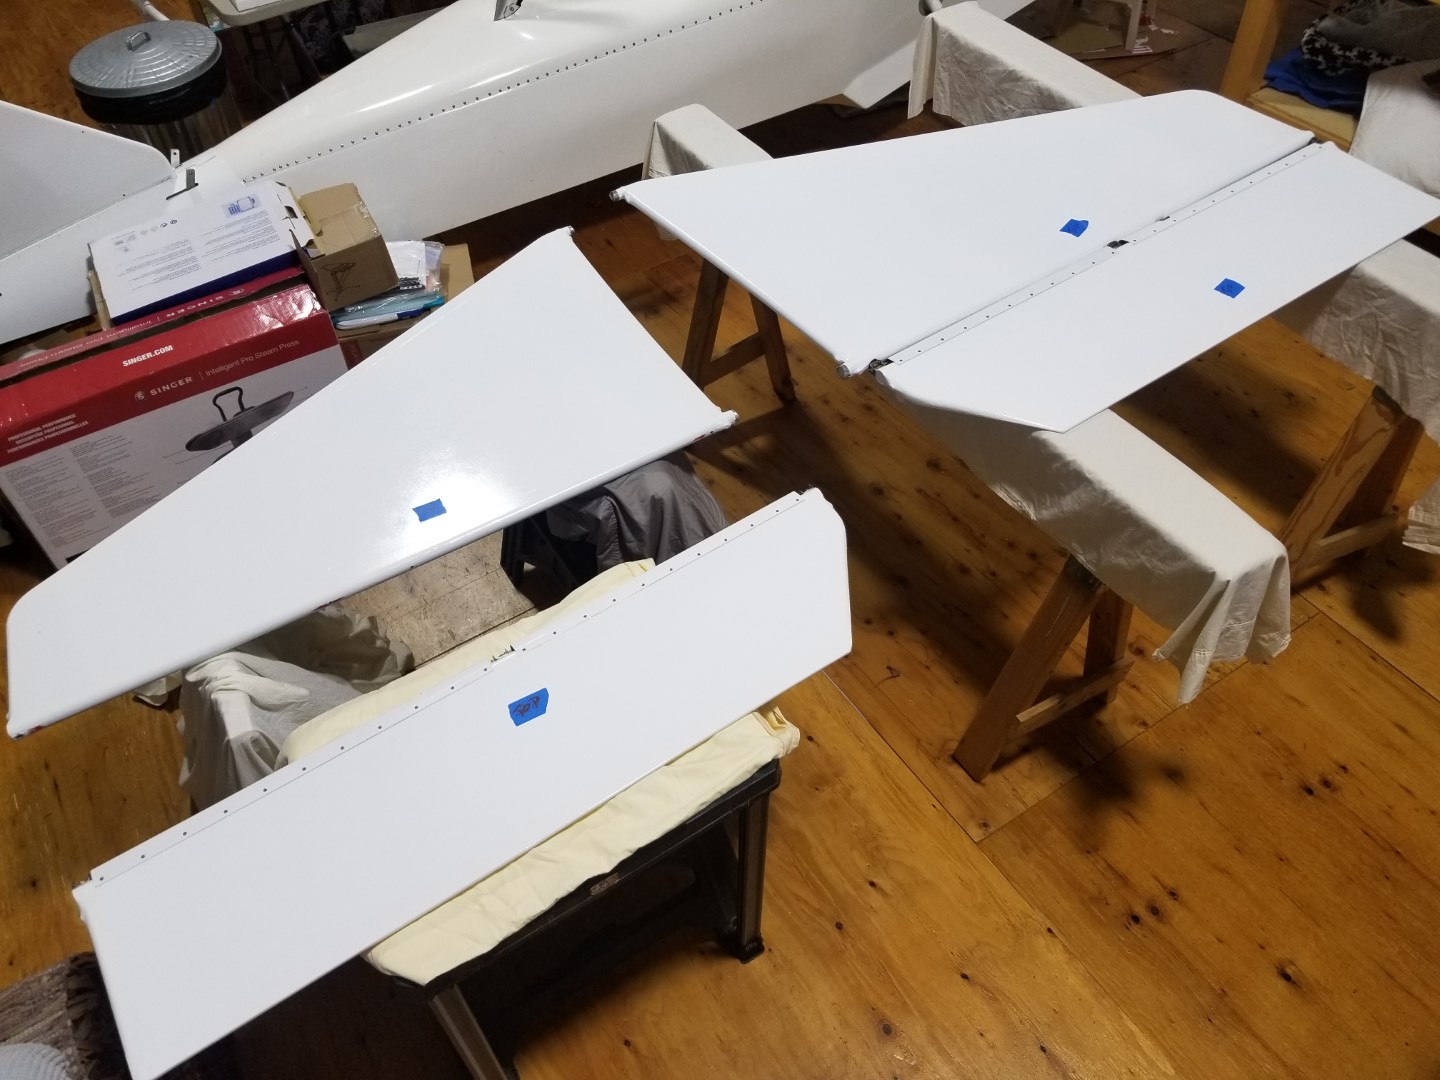
While the silver was drying and outgassing I added the gap seals to the ailerons, elevators, and flaps. I had fitted them yeaaaaarrrrs ago when Osp was living at Einars.


This time the white came out beautifully.


Remember that aileron with the run? Not anymore.


Of course there'd be a piece of FOD the size of a meteor. I SHOULD leave it alone and live with it, but.....


I was terrified I'd paint 2 right or left sides, so if in doubt, lay it out and mark the top with tape. 


Test to make sure whatever paper you're using won't let the paint bleed through. The first one I tried didn't work. Glad I checked.


Playing with the angle of the paint on the stabs,


sometimes you just need a different perspective.I had a close call when I started to make the fan pattern from the root instead of the tip, I VERY carefully peeled the tape off, shook my head to clear the cobwebs, and redid them. After checking them several times. And rechecking them a few times more until I was certain.


Measurements are one thing, but there's nothing like a 1-1 match.This time I remembered to use a pencil.


And of course, who can resist touching it up one more time. Wasn't the last time.


Amazing how much stuff you can fit into a booth. One good thing of laying them flat was it's easier to spray and didn't have to worry about runs, bad thing was that every piece of dust in the air settled on the control surfaces.


I was wondering why I couldn't breath.


Btw, red shows how much overspray blows around and how easily sneaks out of the paint booth through the smallest of openings.


Ooooooooo.......


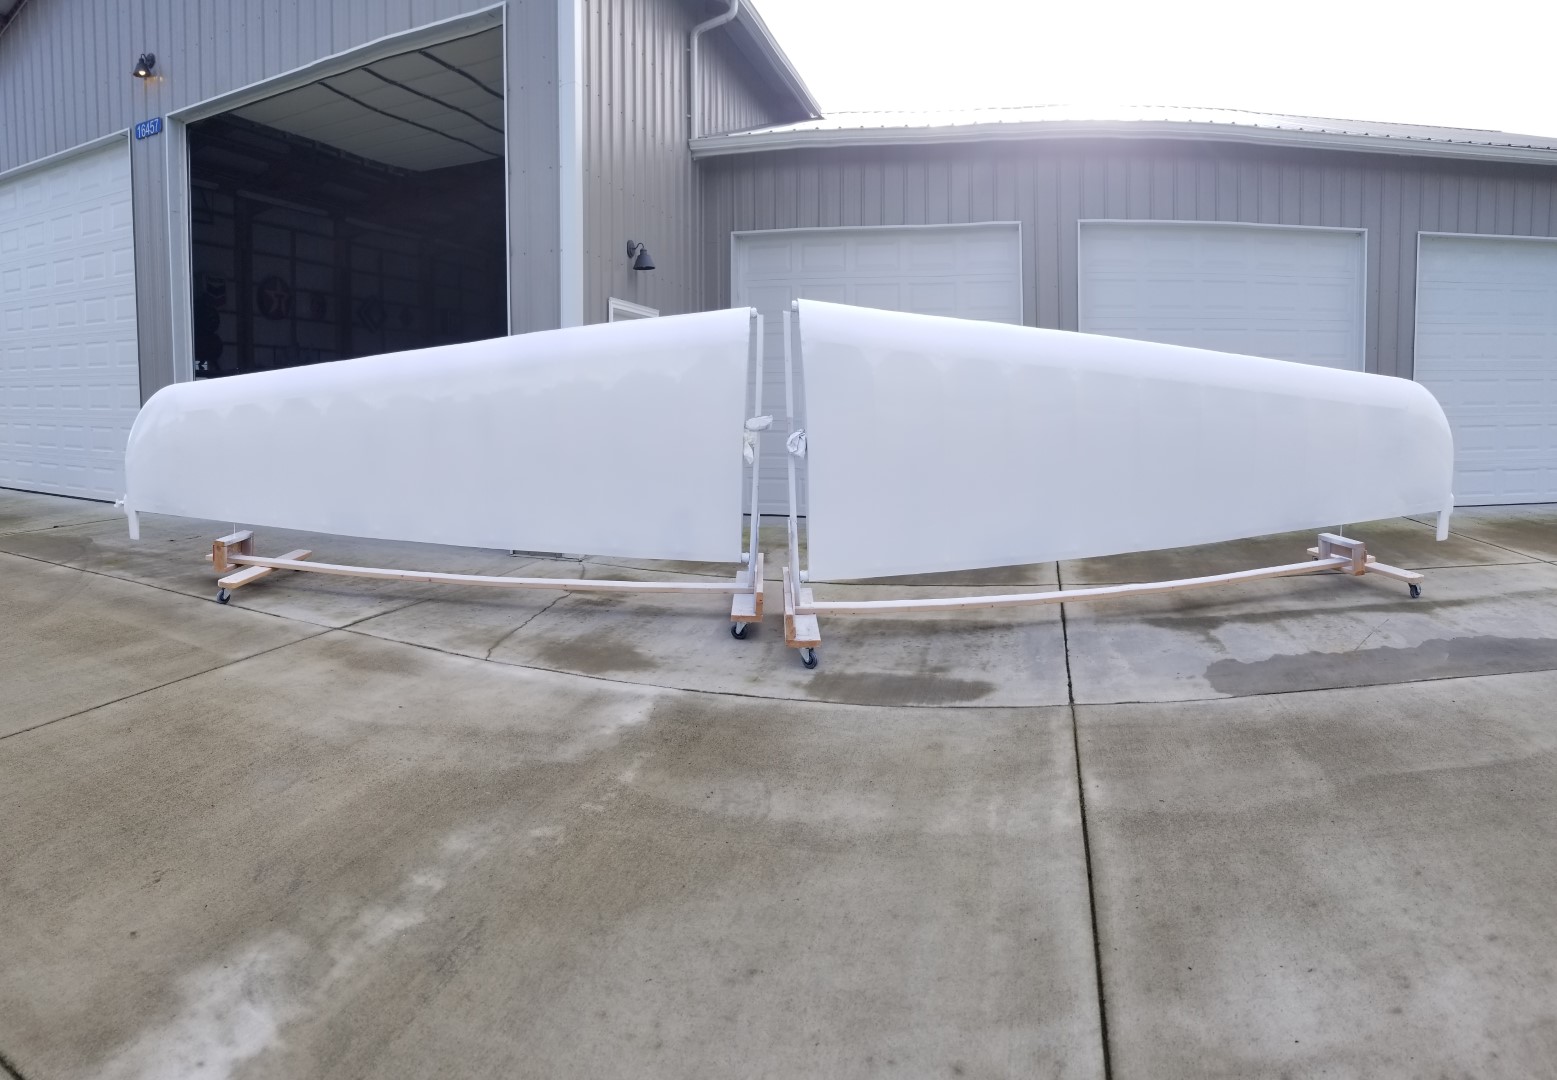
A break in the weather allowed me to briefly move the wings outside and admire the repainting. This is the last time they'll be pure white.


Moment of truth. Time to pull the masking.


Now it's time for the wings. I was wondering how I'd be able to make a 16' straight line, but it turns out the 3M tape lines up perfectly with a bit of stretching. 


Going to try something on the wingtips. 


There has to be a better way than to mask it one sheet at a time.


By the time I got to the other side (2 hours later) I was like "Just get it over with."


So much time to mask and tape, they'll be ripped off in minutes when it's painted.


I wanted to try something a bit different and didn't mask the trialing edges, instead I just shot them from the front and hoped for a feathered trailing edge. Came out nice, methinks.


Damn PA and their QC stamps. And me for missing one. Oh well....


A piece of rolled up paper shoved into the gap seal was good enough to keep paint from going too far.


Damn.


Mostly covered in subsequent coats.


Oooooo.....


This is why I masked the wingtips the way I did, I tried the same feathering on them that I did on the control surfaces. Came out nice.


More masking, more compulsive touching up.


Instead of masking paper, I used painter's plastic to cover the red and white before shooting black. Worked great, but you really gotta be careful to make sure the plastic was sealed. I backed up a couple places with paper over the plastic, just to be sure.


On the last few paint sessions I tried to guesstimate it just right, this time I just went ahead and mixed the entire quart, mixed 50% reducer. It made about 48 ounces and I used about 44 of them.


Shit. I'll bet this leaks. (it did)


And a run. I was able to very carefully tap out most of it.


I was supposed to leave it all alone to dry for a couple hours, but after I got everything cleaned up I decided to go for it.


Yup. Leaker. Not the only one. I've been told to leave them alone, then go back in a couple weeks and buff them off with some grinding compound and 2000 grit sandpaper. Ok.


OOOOooooo!!!!!!!!!


Upon reflection, I may have made the angles too shallow. I had played with the angles on the stab and increased them from what I measured, on the wings I was trying to match the wing lines to the radiator cowling. But in retrospect it looks like I made them too shallow, both should be more forward at the root with a more pronounced sweepback. That the red line is more shallow than the plan is obvious when you compare them to the drawing, and in the drawing the black ends near the end of the metal leading edge sheeting but in reality it's about another 12" to the rear.


Double Oooooo.....


The panorama makes the root look wider than it is. I still go back and forth if I should have made the black and white narrower at the root, give it more sweep, but it looks great, and I'm happy.


More on this later, but here's a teaser.