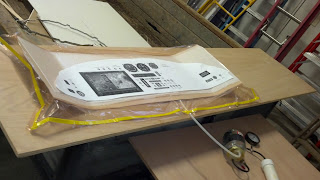
Thursday, January 31, 2013

Finally!!

It was a long wait overnight, Gordon was kind enough to wait for me to show up before we unwrapped it. I was so excited I forgot to take a picture of it fresh out of the bag


I immediately took it out to the hangar (ok, I went home and took a nap first.) and started fitting it. 


Note the blue tape arrow reminding me which side was up.


Later, Gordon came out to help fit it, and instead of my (dumb) idea of holding it to the panel and trying to trace a line, we put the panel on the mold, sat the deck on top of it, then traced the line. We thought the wings at the edge of the panel would tend to splay out, we were wrong. More on that later.


Um, I was a little nervous about making the cut. No going back if it went bad. (by the way, has anyone seen my hairline? If found please return it to me.)


Concentration and teamwork. Gordon held, I cut. The blade bogged down when it hit the Bondo at the angles, even with a fine tooth blade it took some gentle persuasion to get it through.


We were a little nervous about doing the cut so soon after the layup, but I'm on the road for the next two weeks and wanted to get it shipped to Jim before I left. A little sandpaper to take the fuzz from the cutting off....


And it was time for trimming, fine tuning and fitting. 


Remember what I said earlier about the wings splaying out? Either they did not, or (more likely) the hull was wider than the nosedeck. As we started lowering the panel into the hull we noticed the top was higher while the edges were flush. Time to stop, look, talk, measure, look again, remeasure, take a deep breath, cut, and.....


admire a perfect fit.


Now to lock it in. 


Looks a little Steampunk with the screws. Note the final panel design in the background.


Victors get rewarded. 


It's already on the way to Florida for the winter. Jim will mark the locations of the various instruments and switches, ship it back to Gordon for cutting, staining and finishing, then back to Jim for wiring.


Tuesday, January 29, 2013

Final layup

Final layup in progress, can't wait to see it in the morning.


(Yes, I worked. I just like taking pics too.)


After the layup was done Gordon suggested I go practice cutting the panel with the old pieces. Good idea.


Thursday, January 24, 2013

The Fabulous Stains

What color would you like your instrument panel to be?


I like a natural look, not a big fan of makeup, so its no surprise we're going with a clear stain (on the far right) to just bring out the grain. A few minutes of sliding the template around the sheet of veneer to decide what piece...


and the veneer gets clamped over the weekend to take the curve out. Hopefully we'll do the layup Tuesday or Wednesday, and while I'm gone on my next trips Gordon will stain and varnish it. After that it's back to the hangar to be fitted to the nosedeck, then the whole mess gets shipped down to Jim.


With the piece selected we tried some unscientific destructive testing. The veneer ripped before the epoxy bond gave.


Tuesday, January 15, 2013

Wood paneling

We did the first veneer layup last night using the new technique with West Systems 207 clear hardener, came out great. Doing another try with a slight modification and some experimentation today, hope to do the final layup later this week.


A sneak peek at what we're saving for the final pull


Thursday, January 10, 2013

Shooting the engineers

It's been fun playing with layout and design. Frustrating at times, but enjoyable and I'm a little sorry to see this phase coming to a close. I know things will change once we start cutting and installing, but (for now) here's the final layout.


Aesthetically, I liked this version of the panel better, the lines were cleaner and it flowed better. But the version above is a more practical layout.


I stopped by Gordon's, the new veneer has come in and next week we'll do the first test layup. These are the bad pieces, we're not going to show you the good ones. They're spectacular.


Thursday, January 3, 2013

It ain't over until....

I submitted the last panel to a couple high time SeaRey pilots who I greatly respect, one pointed out that it was a long reach to the flap control and that I should do a little rearranging. Good point, and done.


The gear warning button and CB are now on the far right, with the ACI flap controller on the left. The backup fuel pump remains in place, easily reached next to the flap controller. The gear warning alerts will require a reach to press, but that will (hopefully) make me think of what I'm doing. No system is foolproof, because there's always a smarter fool out there. But you can try to minimize the chances.

Still, I couldn't resist a little messing around. As Hal says "Eventually you have to shoot the engineers and build the thing." but until then, who's to say you can't try to improve it? In this case, I'm trying to make the gear warning system cautions easier to reach, and it brings the lights/systems switches closer, too.

So, would it work better to have the selector lights on top...


on bottom


or leave them on the far right side?


I thought about color coding the selector buttons for green and blue, but they don't make the pushbutton switches in blue. Oh well, it was an idea.  


Note: after asking on a couple internet forums, it's been determined that the 12:00 instrument story is incorrect. Good idea though.

Tuesday, January 1, 2013

"About there", aka Human Factors

Digital instrumentation has it's uses, but sometimes all you need is a quick glance. I don't know if this is true or not, but I was told that in WW II bombers such as the B-17, 24, and 29 the engine panel was designed so that when things were normal in cruise, all the needles would be at the 12:00 position. That way a quick glance would show the instruments to be either at 12:00 and nominal, or not at 12:00 and there was a problem.


Let's face it: there are times when you don't need to know that your altitude is 2,451', when all you want to know is that you're within 100' of your assigned altitude of 2,500' when passing through the Seattle Class B VFR corridor, and are busy aviating, navigating, and communicating.

Because of this, when the problem of having the compass too close to the radio came up it gave me an opportunity to rethink my panel. While most of my flying will be in a non-radio/ATC environment at low level (below 1,0'), occasionally when going across the border or transiting other airspace under ATC control, I may be assigned an altitude and need to stick to it. In that situation the Skyview would have a split display of engine instruments on one side and airspace on the other, leaving me with a small digital readout of altitude mixed into the airspace display. If I was flying with another pilot in the left seat and I was in the right seat, it might be difficult to see.


The end result is that in order to minimize electrical interference with compass, I've decided to add an analog altimeter to my center panel. I'm really liking this version of the panel, and consider it final. Can't wait to start building it.