More metal work, more parts of the airframe disappearing from sight. First, assemble the flap actuator mechanism.


The aft ends of the pylon covers should get a slight crimp to fair into the aft root tube better, but not all of us have a 30" brake. A quick visit to Carlson Steel and the guys used their huge press to make a 20 deg bend in the last 1/2" of the 0.016" cover.


Before starting to fit the cover, a little trimming of some brackets, purely for aesthetic reasons.

The top is already notched for the root tube

but not very well. Even in a fixed area it needed trimming. I wonder what and when things changed?


It's non-structural soft aluminum, the side covers are just to hide the pylon interior and they take very little impact loads so they're only 0.016" thick. After experimenting with different tools, I found the aluminum could be easily cut with a cheap pair of scissors.


Each turtledeck fits slightly differently, depending on the builder, so the pylon is given a generous amount of overlap on the bottom to allow trimming and fitting. Other builders have had luck with making up paper and cardboard templates, but the paper was too flimsy to get a good measurement on,


I decided to just fit the cover as I went. This meant risking scratching the fiberglass on the turtledeck, so I'd have to be careful.

Little by little, snip, snip, snip.

The scratches buffed out.

At the aft end it became obvious it was time for a big cut. Deep breath.

The big cut was exactly right, now it was time to smooth everything out into a smooth curve.

Hmmm... I wonder how symmetrical the sides are? They are? Excellent.

Cuts the work in half, just lay the right on top of the left and trim slightly oversize, just in case.

Better too big than too small.

Now mark the tubes on the inside of the covers


And drill for the rivets. The manual calls for rivets on the diagonal, others debate the necessity. They're mostly there to keep the cover from oil canning in the slipstream and making noise. Of course, with the engine just a couple feet further aft, will you notice?

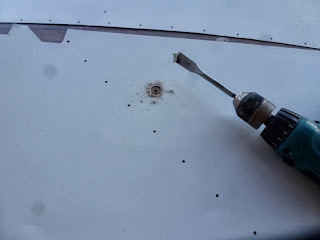
Now a cool technique. Put a marker in the flap horn and run the motor.

drawing an arc over the flap travel.

Drill a hole for the pivot bolt

Sketch a tangential line from hole-hole.

and use snippers to cut out the excess. Then file smooth.


I used a 1" hole saw because I wasn't that confident in my metal skills. In retrospect I wish I had used the 3/4" for a nicer fit, but it's ok.


Part of the angle shows through the flap arc, the belt sander quickly fixed that.


Summer is definitely over, it's sweatshirt time in the hangar, already dropping down into the 40s at night.

The front of my covers had about a 1/2" lip that needed to be trimmed back to be flush with the front root tube.


I love it when a pylon comes together. (sorry, couldn't resist.) Sticky notes denote what rivets go where since you use stainless steel on the metal-metal, and aluminum on the metal-fiberglass along the base.

The second rivet didn't fit, so I grabbed the drill and started cleaning out the hole. Met a lot of resistance and the hair on the back of my neck stood up on end screaming that Something Was NOT Right and STOP NOW!!

Glad I did. I was about to drill through my wire bundle.

Fortunately, all I did was barely dimple a cable.

This is why I'm a bit of a hoarder. A piece of scrap moved the wires out of harms way.

Chunk, chunk, chunk...

And the top is anchored.

I've seen a lot of variance in the aileron tube cover, some like it faired into the pylon covers,

while some like them as outies. This is convention for aircraft, since this way airflow cannot get under the front of the fairing and lift it. However, because it's such a small area and in a bubble of low pressure, you can get away with tucking it into the pylon covers and going against convention.


The aft ends of the pylon covers should get a slight crimp to fair into the aft root tube better, but not all of us have a 30" brake. A quick visit to Carlson Steel and the guys used their huge press to make a 20 deg bend in the last 1/2" of the 0.016" cover.


The top is already notched for the root tube

but not very well. Even in a fixed area it needed trimming. I wonder what and when things changed?


It's non-structural soft aluminum, the side covers are just to hide the pylon interior and they take very little impact loads so they're only 0.016" thick. After experimenting with different tools, I found the aluminum could be easily cut with a cheap pair of scissors.


Each turtledeck fits slightly differently, depending on the builder, so the pylon is given a generous amount of overlap on the bottom to allow trimming and fitting. Other builders have had luck with making up paper and cardboard templates, but the paper was too flimsy to get a good measurement on,

while the cardboard was too coarse. Jim told me the tolerances were 1/32" of an inch, and while I knew he was joking I wanted to make it look good.

I decided to just fit the cover as I went. This meant risking scratching the fiberglass on the turtledeck, so I'd have to be careful.

Little by little, snip, snip, snip.

The scratches buffed out.

At the aft end it became obvious it was time for a big cut. Deep breath.

The big cut was exactly right, now it was time to smooth everything out into a smooth curve.

Hmmm... I wonder how symmetrical the sides are? They are? Excellent.

Cuts the work in half, just lay the right on top of the left and trim slightly oversize, just in case.

Better too big than too small.

Now mark the tubes on the inside of the covers


And drill for the rivets. The manual calls for rivets on the diagonal, others debate the necessity. They're mostly there to keep the cover from oil canning in the slipstream and making noise. Of course, with the engine just a couple feet further aft, will you notice?

Now a cool technique. Put a marker in the flap horn and run the motor.

drawing an arc over the flap travel.

Drill a hole for the pivot bolt

And a series of 3/4"-1" holes along the arc.
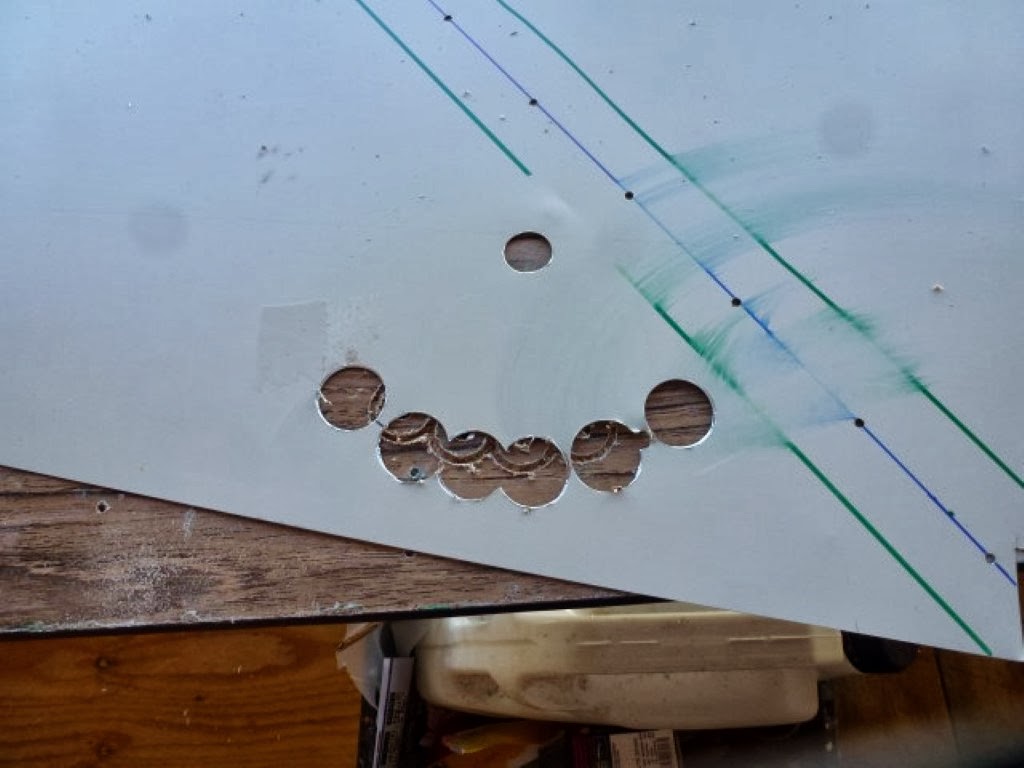
Sketch a tangential line from hole-hole.

and use snippers to cut out the excess. Then file smooth.


I used a 1" hole saw because I wasn't that confident in my metal skills. In retrospect I wish I had used the 3/4" for a nicer fit, but it's ok.

Next, holes for the radiator lines to the heater were cut. Nothing fancy here, just 2 big holes cut next to each other and trimmed to match.

During final assembly more fairings will be attached at the wing root-pylon junction, and angles get attached at the top of the pylon cover. The front of the angle gets trimmed so it can be anchored behind the root tube front mount.


Part of the angle shows through the flap arc, the belt sander quickly fixed that.


Summer is definitely over, it's sweatshirt time in the hangar, already dropping down into the 40s at night.

The front of my covers had about a 1/2" lip that needed to be trimmed back to be flush with the front root tube.


I love it when a pylon comes together. (sorry, couldn't resist.) Sticky notes denote what rivets go where since you use stainless steel on the metal-metal, and aluminum on the metal-fiberglass along the base.

The second rivet didn't fit, so I grabbed the drill and started cleaning out the hole. Met a lot of resistance and the hair on the back of my neck stood up on end screaming that Something Was NOT Right and STOP NOW!!

Glad I did. I was about to drill through my wire bundle.

Fortunately, all I did was barely dimple a cable.

This is why I'm a bit of a hoarder. A piece of scrap moved the wires out of harms way.

Chunk, chunk, chunk...

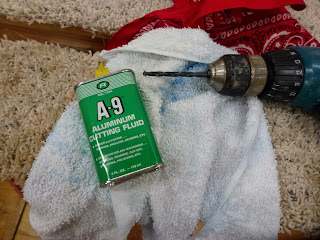
A little bit of cutting fluid

And the top is anchored.

I've seen a lot of variance in the aileron tube cover, some like it faired into the pylon covers,

while some like them as outies. This is convention for aircraft, since this way airflow cannot get under the front of the fairing and lift it. However, because it's such a small area and in a bubble of low pressure, you can get away with tucking it into the pylon covers and going against convention.

