Friday, February 26, 2021

Hooking up

It's easy to build something, but when they need to be repaired, that's another. I've been a bit obsessive about figuring out how to make wires easily disconnectable, I thought I had the problem licked when I discovered dsub connectors, but then I field (hangar?) tested it by sitting in the cockpit and trying to removed them, and it was a mess.

Luckily, a RV pilot on VAF tipped me off about the Molex Microfit 3.0 connectors, the same one Dynon uses on the backup battery connector. The good people at Mouser sell these, and pre-crimped wire leads, too. Perfect for trim relays, among other things. Gives me practice using a multimeter for a continuity check, too.


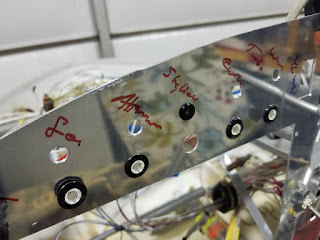
Unfortunately, they were still too big for the Oznium LED alert lights. Scratching my head, I went back to my model airplane roots and dug up these 2 wire power connectors that are good up to 3A, more than enough for the warning LEDs, and they fit through the screw on nuts perfectly. 


I also slightly rearranged the order of the warning lights to match the switches on the panel. Note the original LEDs that I love on the bottom row that turned out to be too bright, and the ones we;re using temporarily mounted across the top. Of course, since the new lights have a smaller opening... I could have filled the bigger holes with mud and redrilled them, but there are a couple other mods I want to make to the panel (tell you about them later), so I'll make another, final (yeah right), panel.


Thursday, February 25, 2021

Fitting the fin (aka, Just gimme the damn chainsaw!)

After painting I was in a mental block about going back to the wiring, so I decided to hang the stabs and take a look. While I was at it, I decided to fit the fin fairing, which turned into a more involved project than I anticipated, especially when I realized that the lineup would influence the handling of Osp. If the fairing was misaligned, she'd tend to yaw one way or another. Sure, I can fix it via the rudder trim tab, but, y'know.

Snap a chalk line from the pylon to the fin leading edge, then rivet the fairing mounting bracket.


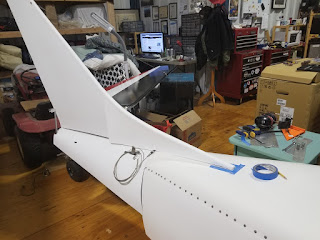
I had been guessing where the fairing should go, finally I realized there was no exact measurements, let the parts tell me, and roughly outlined how much to be trimmed with blue tape.


I kept trying to sand the inside of the fairing by hand but it was so rough and there was so much to remove there was no way I was going to do it by hand. Great idea from the internet, a drum sander from Harbor Freight Aircraft Supply and an extender wand made quick work. Had to be VERY careful though, I nearly went through the side a couple times. 


I kept trying to make a perfect fit, but after examining other builders and thinking about it, I realized a perfect fit meant having a gap for flexibility. Once I realized that I put the ultra-fine Dremel sanding disc away, got the ultra-fine chainsaw out, and carefully made her fit.


Fairing fitted, I was able to mount and trim the stab brackets. They've since been powder coated white and look beautiful.


Take a look at me now...

I was at the Holiday fly-in at Lakeland Airport last December, there was a stunning homebuilt biplane on the showline that made me weep at the quality of the fabric work, the kind of work that just made me want to completely strip and redo Osp. Walked all around the wings admiring the smooth, straight lines, and absolutely perfect, dust free finish. Came up to the cockpit and looked at the rear coaming and...

I can only imagine how that builder felt. On the other hand, maybe I do know.


What's that old saying, A man's reach should exceed his grasp, or what's a heaven for?


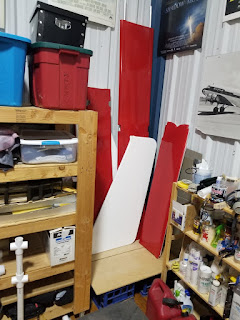
A nice day gave me the opportunity to run everything outside and put it in perspective.


I was finally able to put these on her tail. I don't know why the gentleman made OspRey a member of the Ferret Rescue Service long before she was even hatched, but they're something we cherish.


and for a while, everything gets put away again.